
Checking Your Fluids: The Six Your Car Relies On
Engine oil, coolant, brake fluid, and more—learn what each fluid does, where to find it, and what the levels are telling you about your car's health.
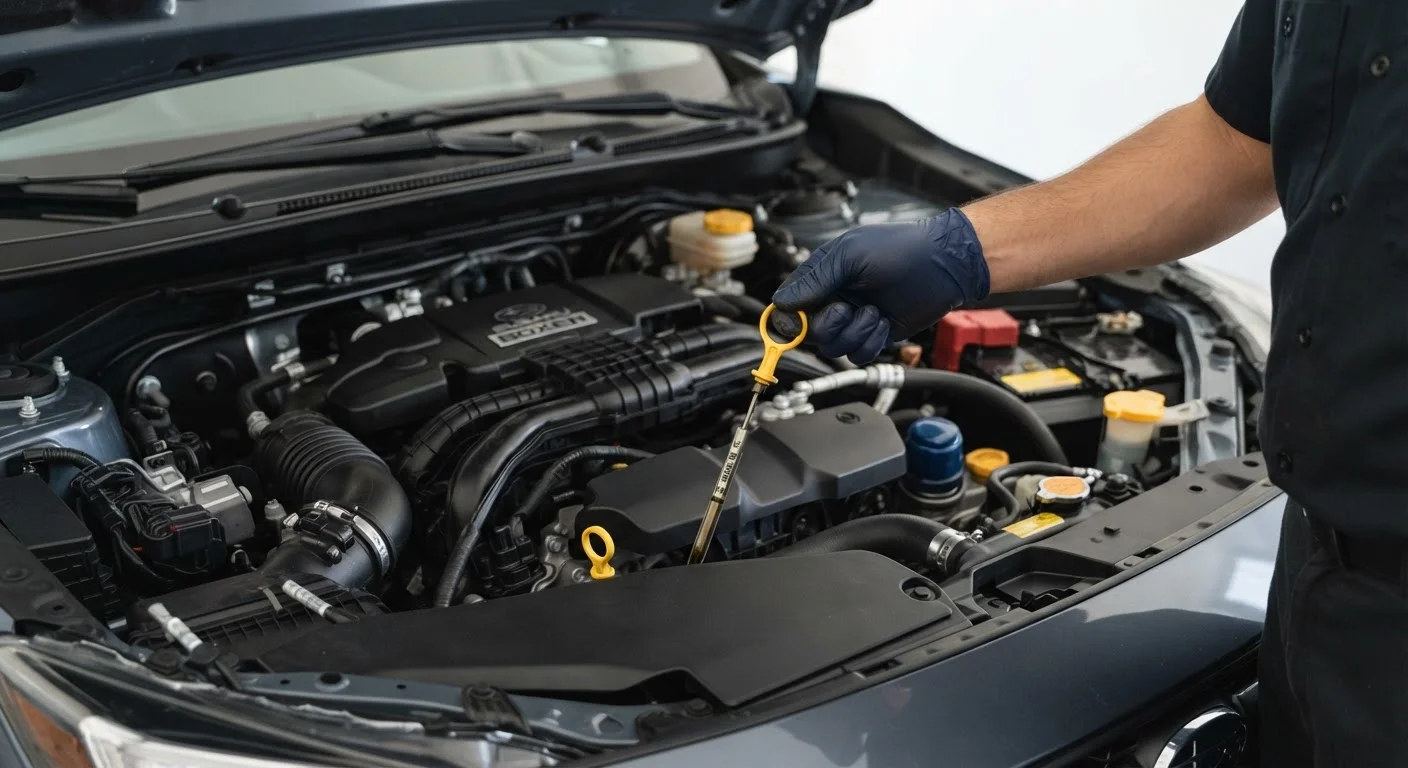
Photo: SummarizedReads.net | Just Read It! editorial
—— In This Article
Key Takeaways
- Six fluids keep your car running safely: engine oil, coolant, brake fluid, transmission fluid, power steering fluid, and windshield washer fluid.
- Most fluid checks require only a clean rag and a few minutes with the engine off and the car on level ground.
- Low or discolored fluid is often the first visible sign of a developing mechanical problem.
- Catching a fluid issue early typically costs far less than the repair it prevents.
- Always consult your owner's manual for the correct fluid types and intervals specific to your vehicle.
Why Fluid Checks Are Worth Your Time
Modern cars are remarkably reliable - but they're still mechanical systems that depend on the right fluids being in the right places at the right levels. Fluids don't just lubricate; they cool, pressurize, and protect components that would otherwise wear out or fail outright. A slow brake fluid leak or engine oil that's two quarts low rarely triggers a dashboard light right away, but both can cause serious damage or a safety incident.
The good news: checking six key fluids costs nothing but a few minutes and a clean rag. Catching a problem early - before a warning light appears - is consistently cheaper than the repair that follows. For a broader view of how fluid checks fit into your overall vehicle care, see our guide to your car's maintenance schedule.
What you will need
What You'll Need
No special equipment is required for most fluid checks. Park on a flat surface, give the engine time to cool, and have your owner's manual within reach - it tells you exactly which fluid types your vehicle requires, which matters more than most drivers realize. Using the wrong coolant type or transmission fluid spec can cause compatibility problems.
Clean rag or paper towels
Used to wipe dipsticks clean before and after reading fluid levels.
Flashlight or phone torch
Helps illuminate the engine bay and fluid reservoirs in low-light conditions.
Vehicle owner's manual
Specifies the correct fluid types, capacities, and check intervals for your specific vehicle.
Nitrile gloves
Protects hands from grease, brake fluid, and other chemicals during the inspection.
How to Check Each Fluid
Work through each fluid in order. The steps below cover what to look for, where to look, and what the readings mean. If anything looks abnormal - discolored fluid, a level that's dropped significantly since your last check, or a reservoir you can't locate - consult your owner's manual or a qualified mechanic before driving.
Check Engine Oil
Locate the oil dipstick - typically a brightly colored handle near the front of the engine. Pull it out, wipe it clean, reinsert it fully, then pull it out again. The oil level should fall between the two marks on the dipstick. Note the color: healthy oil is amber to light brown. Black, gritty, or milky oil signals it's due for a change or that there may be a more serious issue.
Check Engine Coolant (Antifreeze)
Find the translucent coolant reservoir - usually marked with a thermometer or wave icon. Without opening the cap, read the level against the MIN and MAX lines on the side of the reservoir. Coolant should be a bright green, orange, or pink depending on type. If it looks brown or rusty, it may need flushing.
Check Brake Fluid
The brake fluid reservoir sits on top of the master cylinder, usually near the firewall on the driver's side. Most reservoirs are translucent - check the level against the MIN/MAX markings without opening it. Brake fluid should be nearly clear to light yellow. Dark brown fluid indicates it has absorbed moisture and likely needs replacement.
Check Transmission Fluid
Many automatic transmissions have a dipstick similar to the oil dipstick - consult your owner's manual to locate it, as some modern vehicles require a mechanic to check this at a shop. If your vehicle has a dipstick, check with the engine warm and running (for most automatics) unless your manual states otherwise. Healthy fluid is red to pinkish; dark brown or burnt-smelling fluid needs attention.
Check Power Steering Fluid
Many newer vehicles use electric power steering and have no fluid to check. If your car has hydraulic power steering, locate the reservoir (typically labeled and near the engine belt area) and check the level against MIN/MAX markings. The fluid should be clear to light amber. A whining noise when turning is a common sign the level is low or the pump is struggling.
Check Windshield Washer Fluid
The washer fluid reservoir is usually a blue-capped tank and the easiest to top off yourself. There's no safety concern with low levels, but running dry in poor visibility conditions - road spray, bugs, winter grime - creates a real driving hazard. Use a premixed washer fluid rated for your climate; plain water can freeze in the lines and crack the reservoir.
Brake Fluid Drop Warrants Immediate Attention
A noticeably low brake fluid level can indicate a leak in the braking system - not just normal consumption. Do not ignore this. A compromised brake system is a serious safety risk. If the level is significantly below the minimum line, have a qualified mechanic inspect the system before driving the vehicle.
Reading What the Fluids Are Telling You
Fluid condition is often as informative as fluid level. Oil that's jet black and gritty is overdue for a change. Coolant that's brown instead of bright suggests corrosion inside the cooling system. Brake fluid that's turned dark has absorbed water and lost some of its heat resistance. These aren't just aesthetic differences - they reflect real degradation.
If you notice a fluid dropping repeatedly between checks, that's a sign of a leak or internal consumption - neither of which fixes itself. Dashboard warning lights are a backup system, not a first line of defense. Our dashboard warning light guide explains what those lights mean once they do appear, but ideally, regular checks mean you spot the issue first.
Build a Simple Under-Hood Habit
Consider doing a quick fluid scan once a month and before any road trip longer than a couple of hours. It takes under 15 minutes and gives you an early-warning system that no dashboard light can fully replace. Keep a small flashlight in the glove box - engine bays can be dim even in daylight.
For safety-critical systems like brakes, don't delay. If you're unsure what you're looking at in the brake system, our article on how the braking system works provides useful context. And before any long drive, run through these checks as part of your pre-trip inspection routine.
Never Open Coolant Cap on a Hot Engine
The cooling system operates under pressure. Removing the coolant reservoir or radiator cap while the engine is hot can cause scalding fluid to eject suddenly. Always wait at least 30 minutes after driving before checking coolant levels. If you suspect an active coolant leak or overheating, have the vehicle inspected by a qualified mechanic before driving further.

Auto Editorial Team
Auto Editorial Team is the collective byline for our editorial team and contributor network. Articles published under this byline or an editorial pen name are researched, written, and reviewed according to our editorial standards for clarity, consistency, and independence before publication.
View author profile